

Overview:
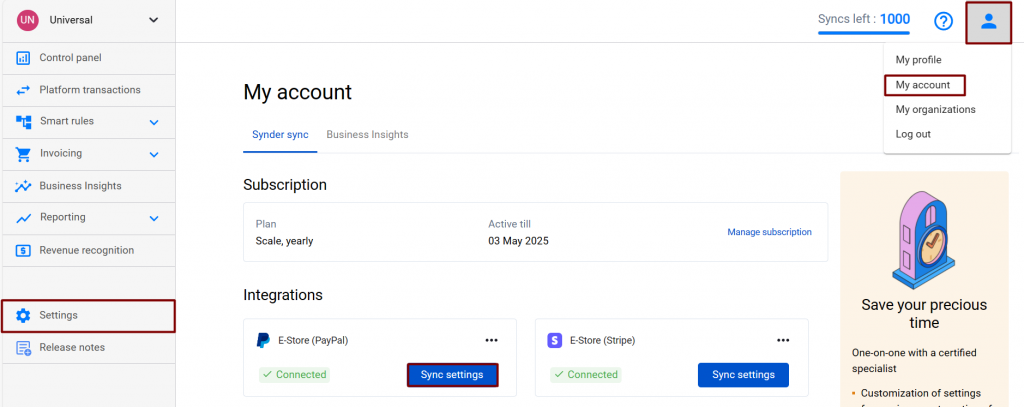
When you have PayPal QuickBooks Online integration connected, you can start customizing your settings. To access your PayPal settings, select the organization needed at the top left of the page → Settings button on the left menu of Synder → choose the PayPal integration from the dropdown. Alternatively, click on the Person icon in the upper-right corner → hit My account → click on Sync settings under PayPal.
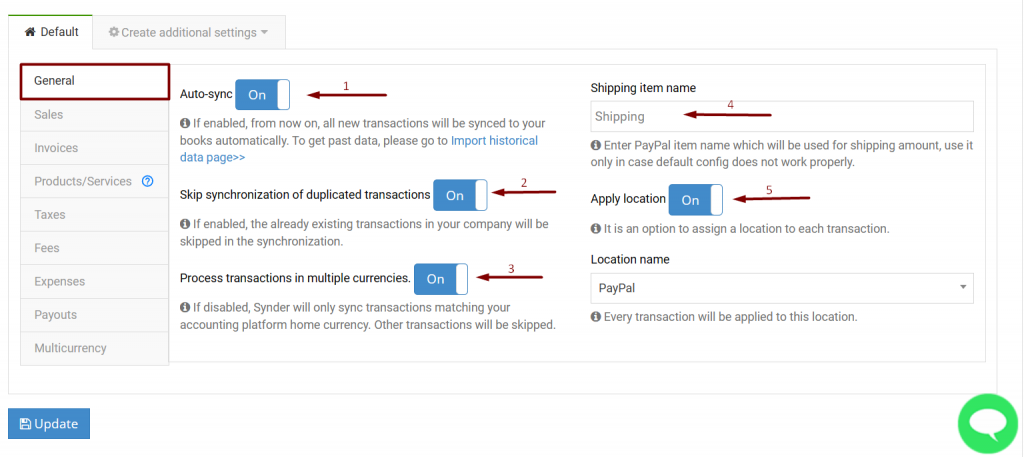
1. General settings
- Auto-sync – when “ON”, Synder will automatically synchronize transactions that come into the system after the setting has been enabled. When “OFF”, you can manually choose transactions to be synced.
Learn more about the auto-sync Synder mode. You can also turn on the manual mode. - Skip synchronization of duplicated transactions – when “ON”, transactions that already exist in your QuickBooks Online company will not be synced again.
- Process transactions in multiple currencies – when “ON”, the system will synchronize transactions not only in your home currency, but also in multi currencies. When “OFF”, the synchronization of transactions in other currencies will be skipped.
- Shipping item name – This setting is needed in case the default configuration is not working and if your invoicing system gives an item name to the shipping. Type in the item name used by your invoicing system here in order for it to appear in shipping line in your QuickBooks Online, rather than being accounted for as a normal item.
- Apply location – when “ON” you can select a location from the ones you have in your QuickBooks Online to sync your transactions with those selected in the dropdown menu.
That’s it!
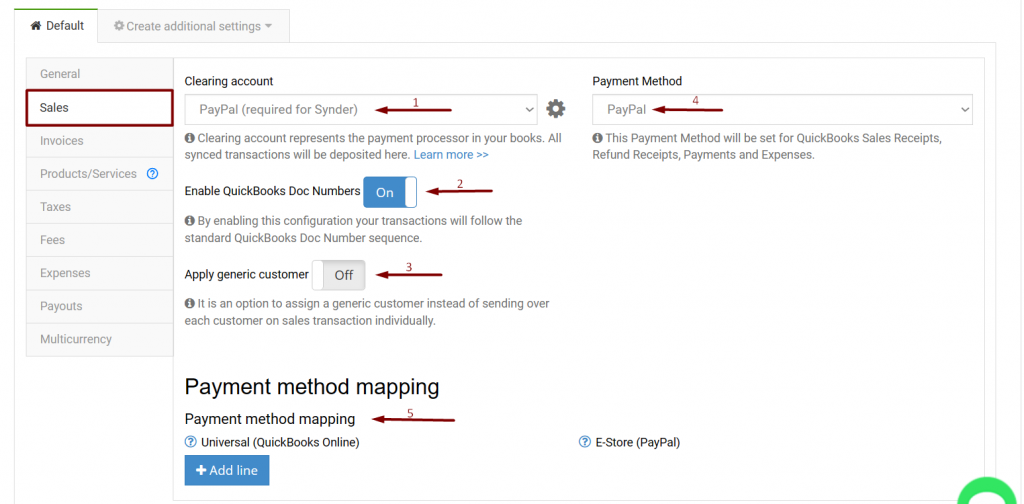
2. Sales settings
Check out the Synder setup guide where you can find our recommended way of a setup.
- Clearing account – a buffer account that QuickBooks sales receipts, refund receipts and payments will be deposited into.
- Enable QuickBooks Doc Numbers – by enabling this configuration, your transactions will follow the standard QuickBooks Doc Number sequence.
- Apply generic customer – when “ON”, it assigns a specific customer name to all of your transactions. Click on to select a name. Choose from existing ones or type in a custom name.
- Payment Method – choose a payment method (cash, check, credit card, PayPal) that will be set for QuickBooks sales receipts, refund receipts, payments and expenses.
- Payment method mapping – map payment methods used in PayPal to those available in QuickBooks Online.
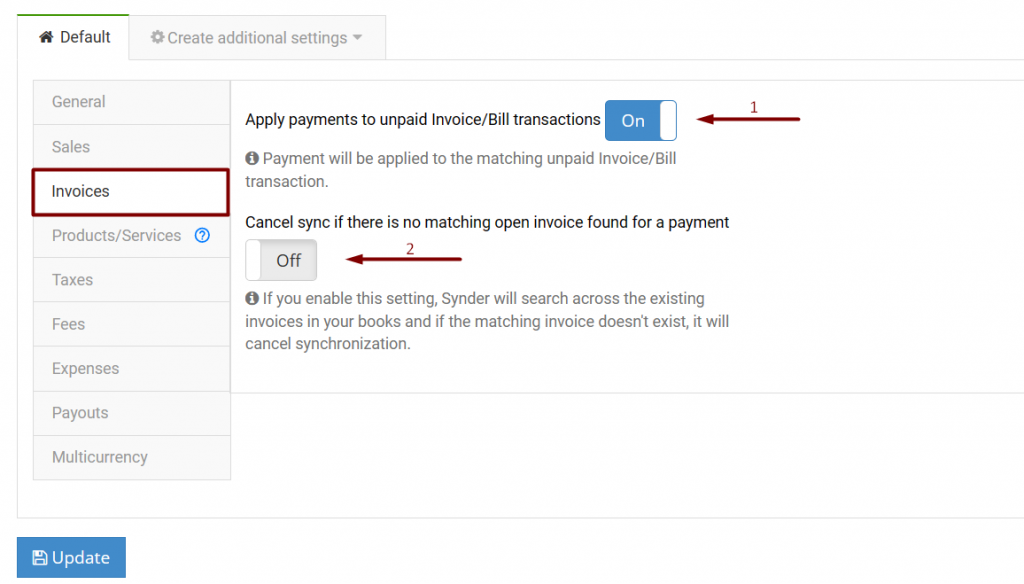
3. Invoices settings
- Apply payments to unpaid Invoice/Bill transactions – when “ON”, once the system encounters a payment that matches an unpaid invoice, it will be automatically applied to it.
- Cancel sync if there is no matching open invoice found for a payment – if there isn’t an open invoice that can be closed with a payment from PayPal, the system will cancel the synchronization of your payment.
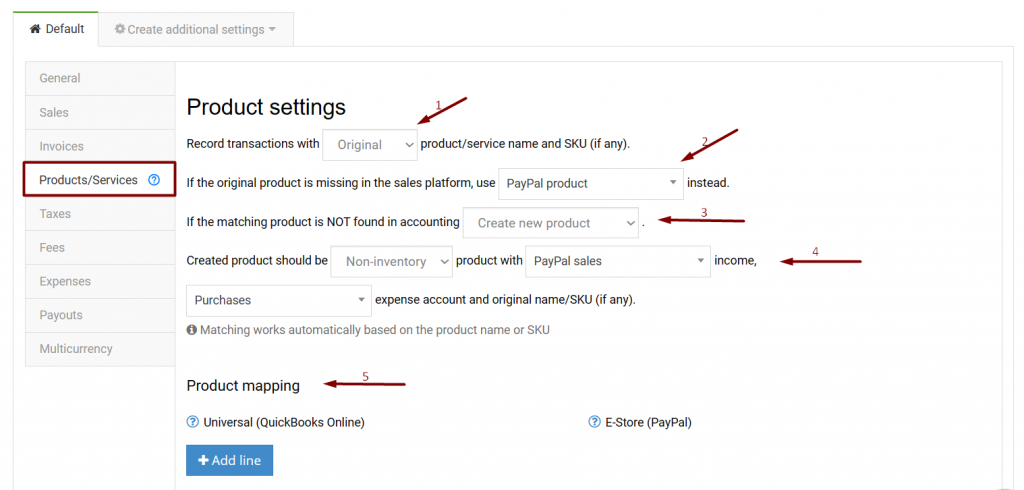
4. Products and Services tab
This setting tab is targeted at new products and services which are created during the synchronization. Product/service type can only be non-inventory or service, because when Synder creates a new product, it does not have access to its Quantity on hand. Existing inventory products will be properly updated.
The income account specified here will be used for creating new products and services only.
- Record transactions with Original/Common product/service name and SKU (if any) – choose whether you want Synder to record transactions with the original product name. This option will either map the product to an existing one by an item name or SKU, or create a new one if it doesn’t exist. Alternatively, record them with a common product name. This will log all further transactions with a specific name you can select below.
- If the original product is missing in the sales platform, use the item name/SKU instead – this product you select will be created if there is no matching one available.
- If the matching product is NOT found in accounting, you can choose to either let Synder create a new product or cancel the synchronization of your transaction.
- Select the type of newly created product, which can be either non-inventory or service, and choose the income account that will be assigned to the newly created product.
- Product mapping – Synder is able to identify existing products in your accounting company and apply them to transactions. If product names in your payment system and accounting company don’t match 100%, fill in the product names from your payment platform in the right field to map it to product names from your QuickBooks in the left field. Check out an additional guide about product mapping feature.
Note: please check the plans where the product mapping feature is available by following this link.
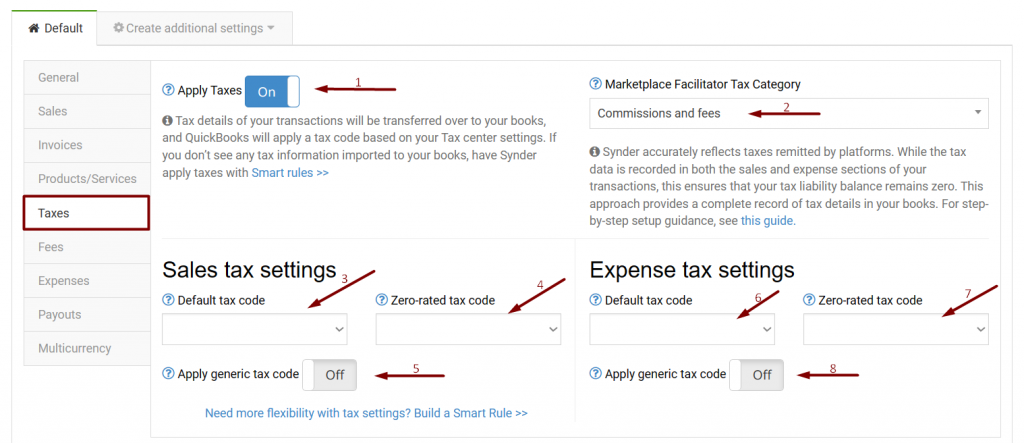
5. Taxes tab settings
- Apply taxes – when “ON”, the system will search for a matching tax code and apply it.
- Marketplace Facilitator Tax Category – if you have taxes remitted by the platform, Synder will record them in both the sales and expense sections of your transactions to ensure the tax total is 0. Select the category where such a tax will be recorded from the expense section. For more details, refer to this helpful guide.
- Sales Tax settings. Default tax code – choose a tax code name that Synder will use for all Sales transactions marked as “taxable” in your payment system, without changing the tax amount in these transactions, in case the actual tax rate is not found.
- Sales tax settings. Zero-rated tax code – choose a zero-rated tax code, Synder will apply to every item (line)/shipping line which doesn’t contain any other tax rate in the original transaction.
- Sales tax settings. Apply generic tax code – when “ON”, the system will apply the tax rate you specify in the settings to both taxable and non-taxable Sales transaction you sync.
- Expense tax settings. Default tax code – choose a tax code name the system will use for all Expense transactions marked as “taxable” in your payment system, without changing the tax amount in these transactions, in case the actual tax rate is not found.
- Expense tax settings. Zero-rated tax code – choose a zero-rated tax code, Synder will apply to every item (line) which doesn’t contain any other tax rate in the original transaction.
- Expense tax settings. Apply generic tax code – when “ON”, the system will apply the tax rate you specify in the settings to both taxable and non-taxable Expense transactions you sync.
*This screen will be slightly different for US and Non-US companies. Check out more about how sales tax work in Synder.
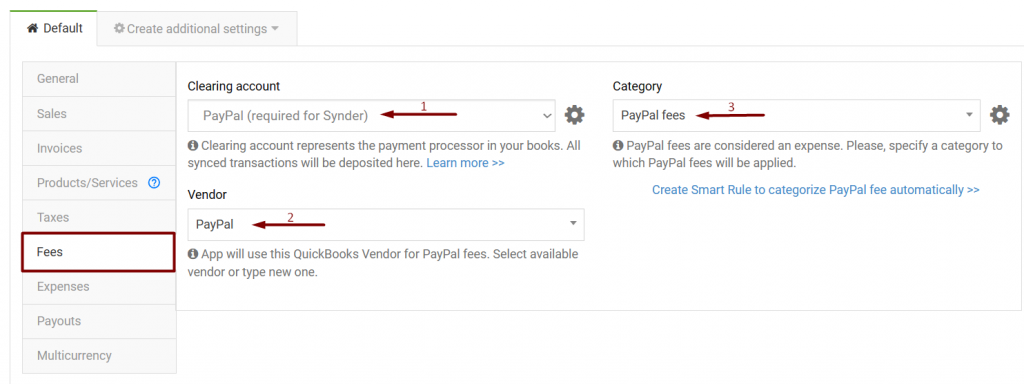
6. Fees tab settings
- Clearing account – this setting specifies the clearing account to which the PayPal fees are applied. We recommend using the same account as in Sales – Clearing account.
- Vendor – the system will use this QuickBooks Vendor to store your PayPal fees. Select available, or type in a custom one.
- Category – this setting specifies the category to which the PayPal fees are applied.
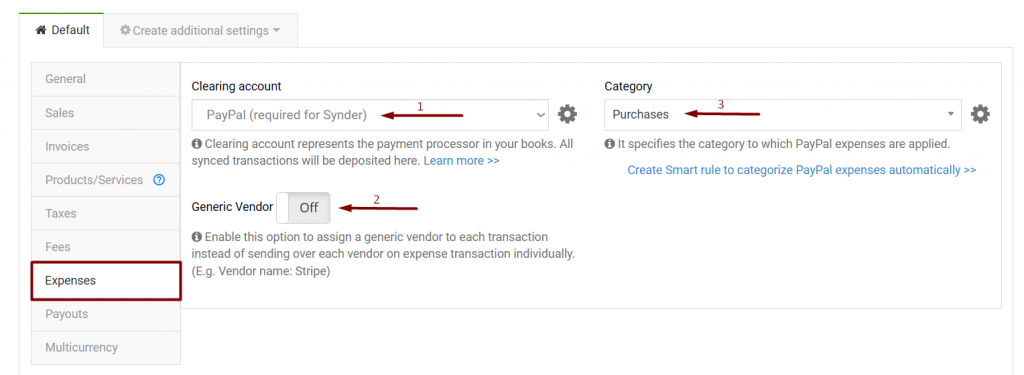
7. Expenses
- Clearing account – this setting specifies the Clearing account that the expenses are attributed to. We recommend using the same account as in Sales – Clearing account.
- Generic Vendor – when “ON”, it assigns a default vendor name to all the vendors, instead of creating a new one for each transaction. Choose from existing ones, or type in a custom vendor name and press enter.
- Category – this setting specifies the category that the expenses are attributed to.
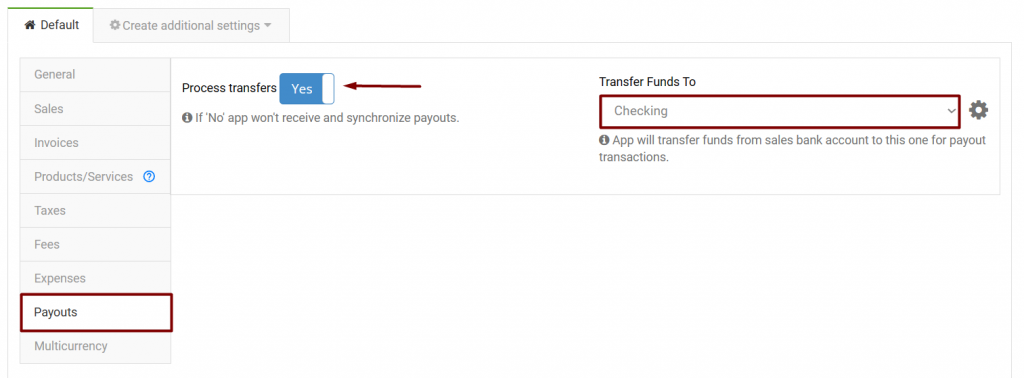
8. Payouts
This tab allows you to track Payouts that PayPal deposits to your checking account. The system will record them in QuickBooks, allowing for a simple matching of your actual deposits from PayPal to transfers that you have synced with Synder.
- Process transfers – when “ON”, Synder will track and create transfers reflecting PayPal payouts to your checking account.
- Transfer Funds To – Choose the checking account that you deposit the funds from PayPal to.
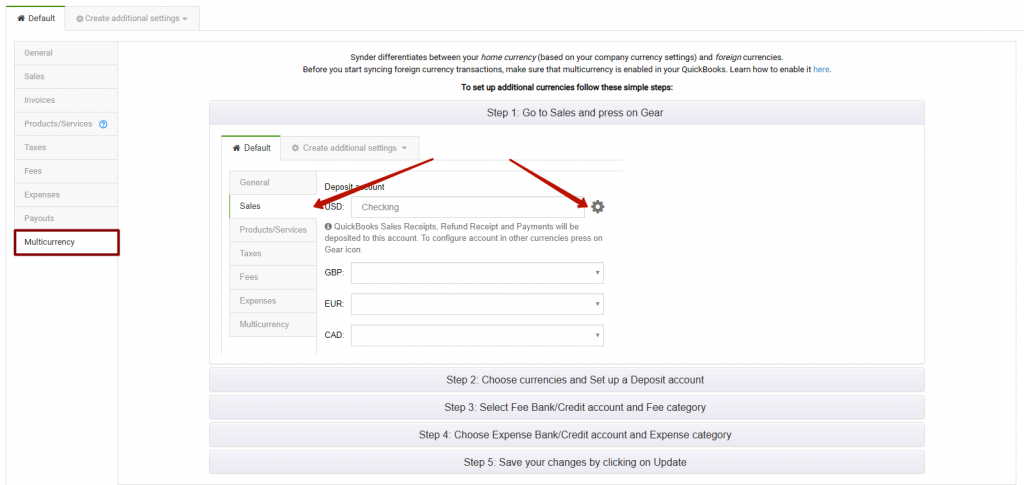
9. Multicurrency
You can find how to customize Multiple Currencies here in the Multicurrency tab. Check how to enable multicurrency in QuickBooks.
Reach out to the Synder team via online support chat, phone, or email with any questions you have – we’re always happy to help you!
This has been a very important Guide as it prepares us for the business world
Thank you for your feedback, Kyle! We are happy to hear that the guide is helpful and hits the mark.