

Synder constantly works on adding new sales channels and payment platforms to the list of supported integrations. However, if you have any unsupported providers you would like to sync to your accounting system, you will find the new Excel import feature very helpful. It allows you to import any data from an Excel spreadsheet to Synder and then operate with the uploaded data as with regular transactions by syncing them to your accounting company. Now you can consolidate transaction data import from all payment and e-commerce platforms you are using at no extra costs with Synder.
Overview:
Adding excel import option to your Synder profile
First of all, you should connect your QuickBooks or other accounting company to Synder and then add Excel as one of your payment platforms. Follow the steps below and use Synder to its full capacity to upload excel to your accounting company.
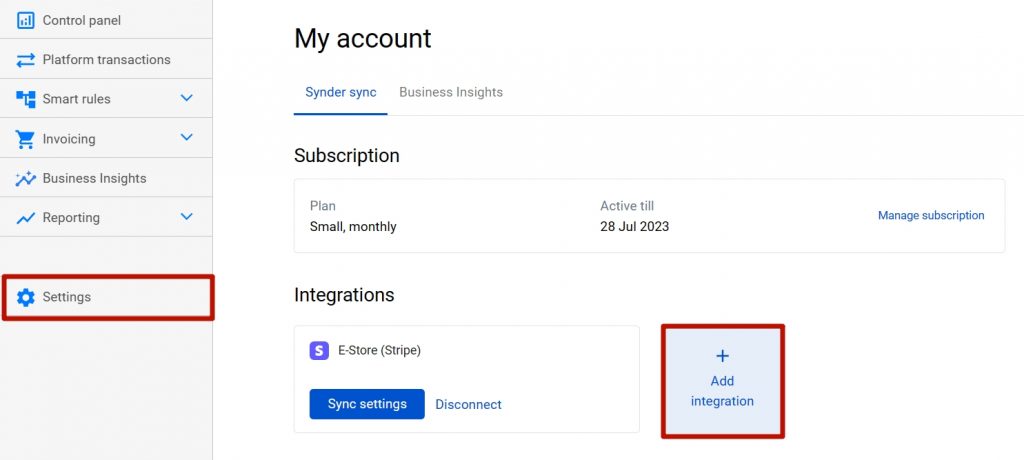
Step 1: Go to your organization’s settings in Synder → hit the “Add integration” button.
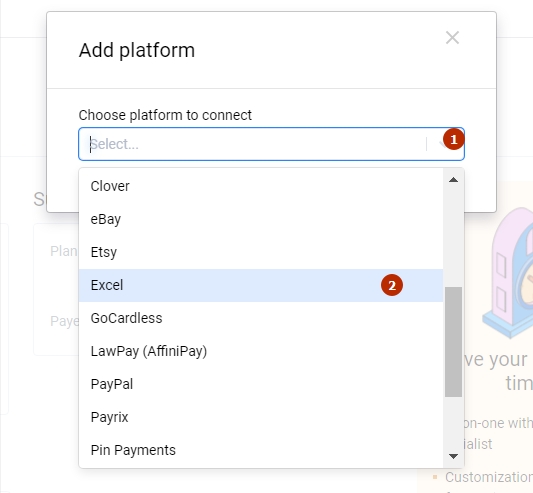
Step 2: Select Excel in the Add integration dropdown.
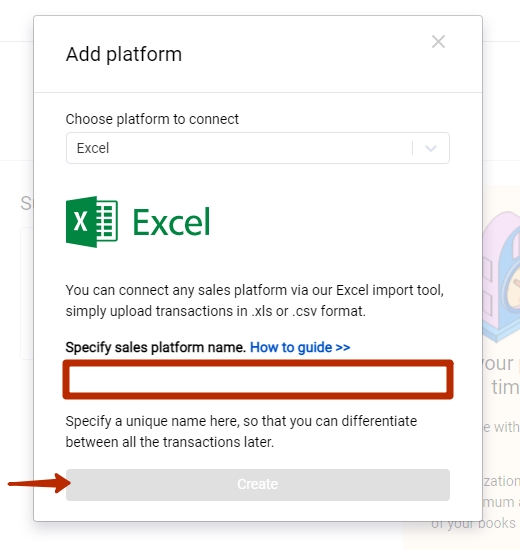
Step 3: Enter the provider name for Excel, you may call it as you wish to → click “Create”.
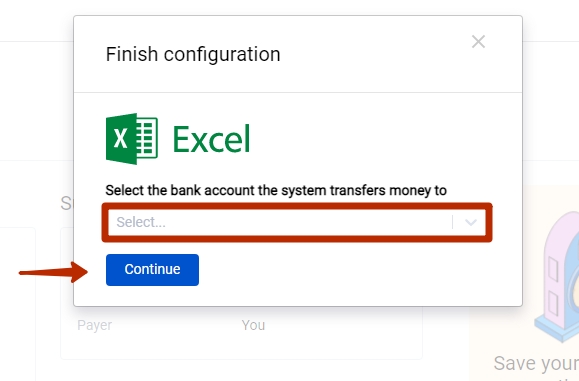
Step 4: Choose an account for payouts and hit “Continue” to finish the set up.
Import Excel to Synder accounting, QuickBooks or Xero
As soon as you have finished the setup, you may proceed to the bulk transactions import from excel to Synder accounting, QuickBooks or Xero.
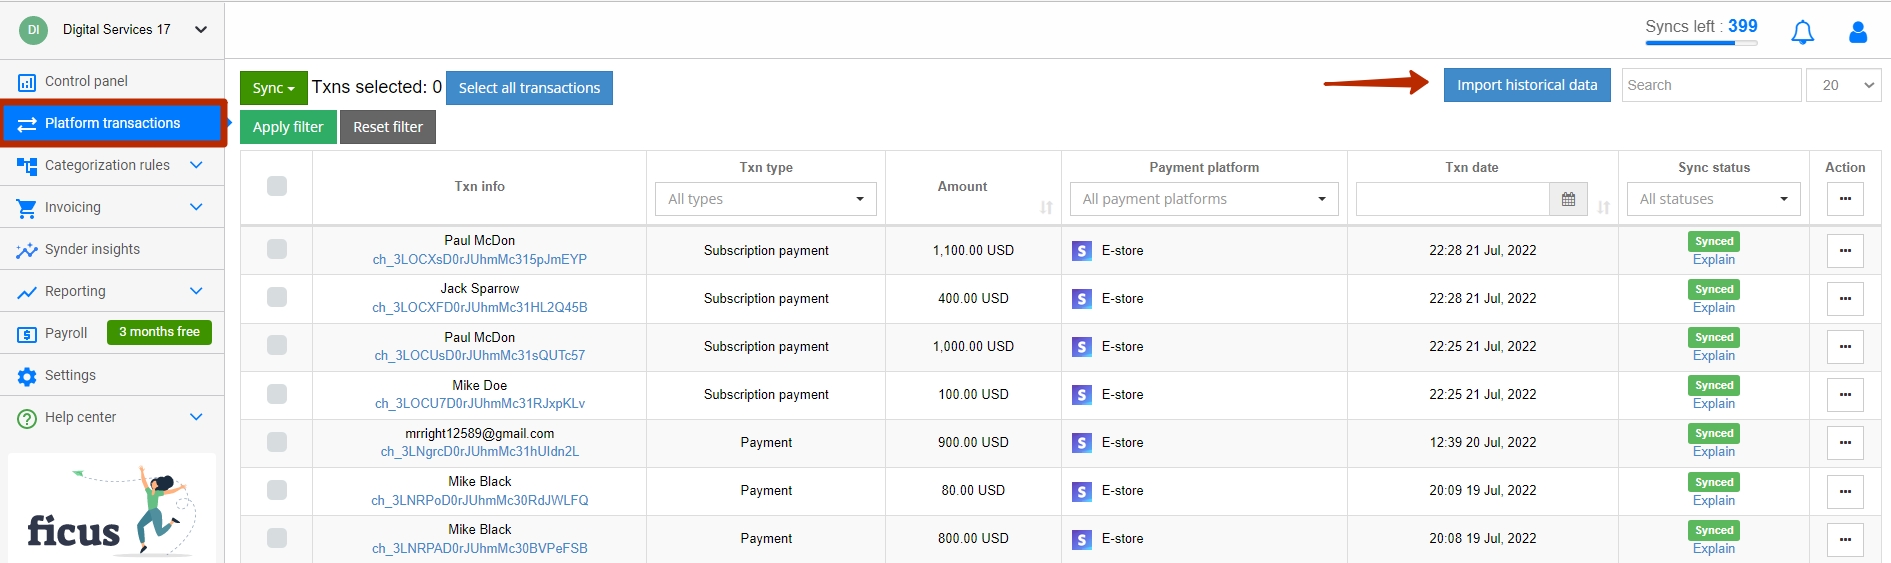
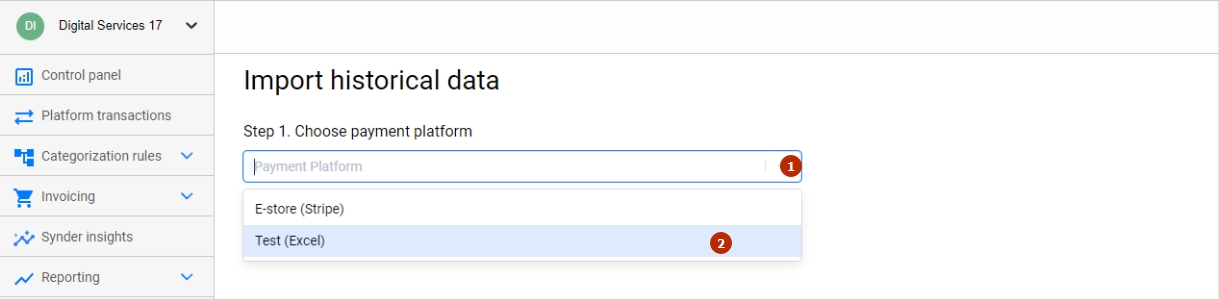
Step 1: Go to the “Platform transactions” tab→ click on “Import historical data” – > choose Excel from the list of payment platforms you have connected to your account.
*Select the “excel provider” needed if you have connected excel to account for several unsupported providers.
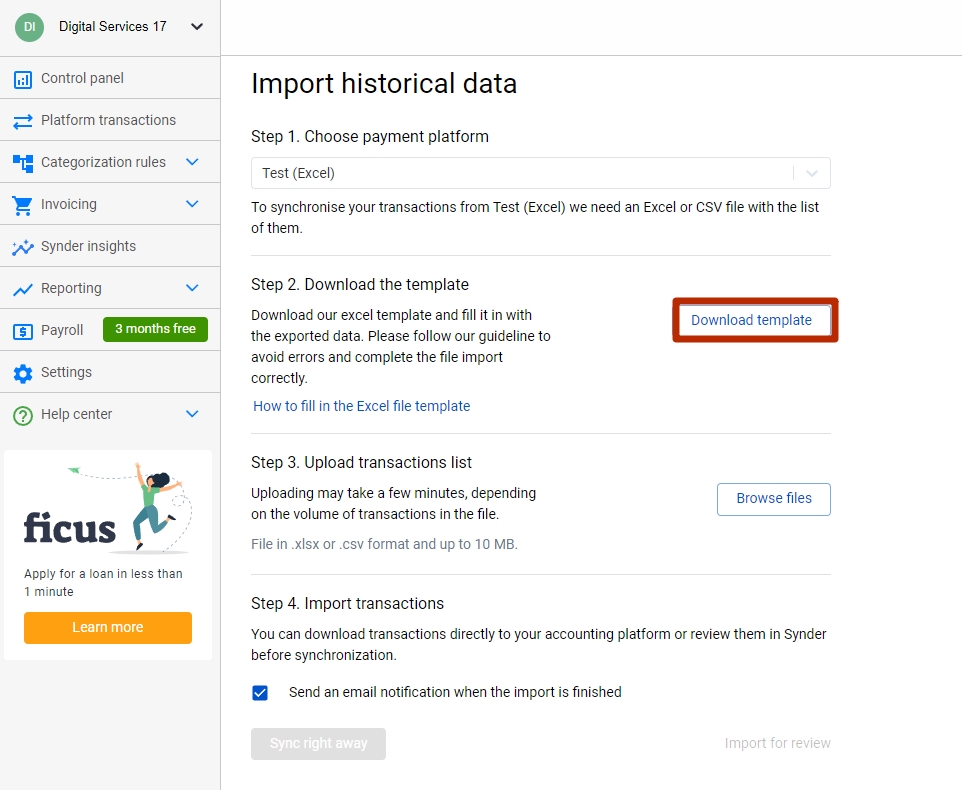
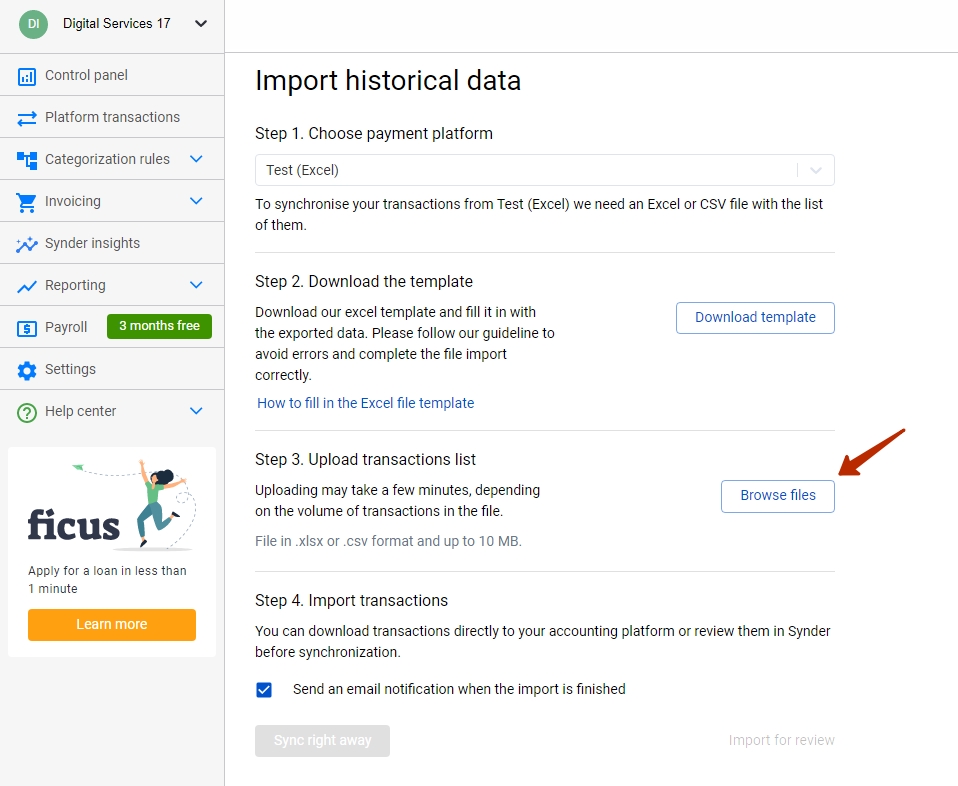
Step 2: Upload your excel file from your PC → click on “Browse files”. We recommend you download and use our ready-made template and fill it in with the data you export from the unsupported payment processor (use step 2 -> “download template” button). Having the template filled in, you will be able to upload it to Synder accounting, QuickBooks or Xero.
How to fill the import template with your data
The template supports four types of transactions that may be synced to your Synder accounting, QuickBooks or Xero company, so be sure to change the transaction types if their names differ:
| Template type | QuickBooks/Synder accounting transaction | Xero transaction |
| PAYMENT | Sales Receipt/Expense (*depending on the positive or negative figure in the file) | Invoice+Payment / Bill+Payment (*depending on the positive or negative figure in the file) |
| EXPENSE | Expense (regardless of the + or – sign) | Bill+Payment (regardless of the + or – sign) |
| REFUND | Refund Receipt (regardless of the + or – sign) | Credit Note (regardless of the + or – sign) |
| DEPOSIT | Deposit (regardless of the + or – sign) | Credit Note (regardless of the + or – sign) |
Useful notes:
- Required fields are marked with *; make sure you fill them in before the import.
- The “Number” column will be synced to your accounting as the reference number of the transaction.
- The “Transaction ID” field is used to join several product lines to a single transaction.
For instance, you can use the Order number and paste it to several lines in a row to make sure the app knows these lines compose a single order. - If you specify a value in the “Fee amount” column in addition to the sale amount, the app will create both income and expense transactions during the synchronization (for example, Sales Receipt for total sale amount and Expense for fee amount)
- If you fill in the amount, you should specify the currency for that amount (like if you specify the “Fee Amount” field, then fill in the “Fee Currency” field)
- If you leave the “Exchange rate” field blank and the currency differs from your home currency exchange rate will be automatically assigned by your accounting platform based on the date of the transaction.

Step 3: After uploading the file, you will have two options. The first one is to upload the transactions from your spreadsheet to Synder before synchronizing them to your accounting platform. To do that, hit the “Import for review” button.
If you click on the “Sync right away” button – the list of your transactions will be uploaded from the excel file to your accounting company right away without your prior confirmation.
You may also select the option “send an email notification when the import is finished”.

Useful tips on excel bulk import to accounting software
Note 1: If you close or reload the page – the upload will continue in the background.
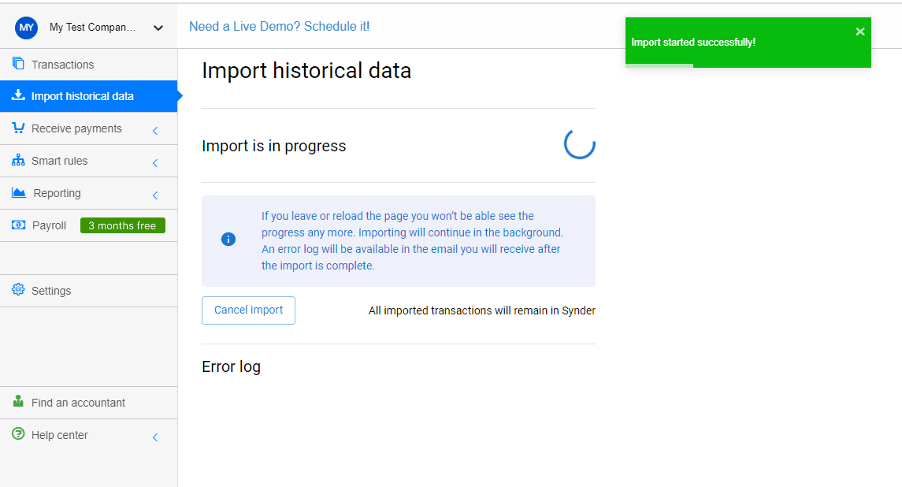
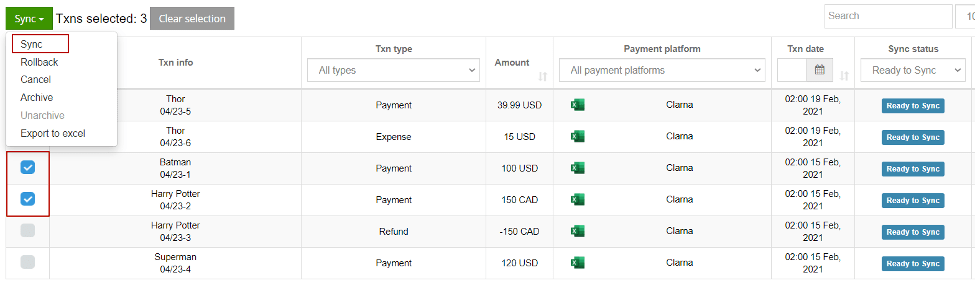
Note 2: You may check the transactions in your transaction list in Synder and manage the synchronization as usual.
Note 3: If you try to upload the file with the same “Transaction ID” several times, Synder will skip them as duplicates. If you would like to re-import the same transactions in a different way, please follow these steps:
- Archive unneeded transactions from Synder (select them -> click Sync button -> Select Archive option)
- Open your excel file, change “Transaction ID” to something that was not in the file before
- Follow the steps described above in the guide to import the file again.
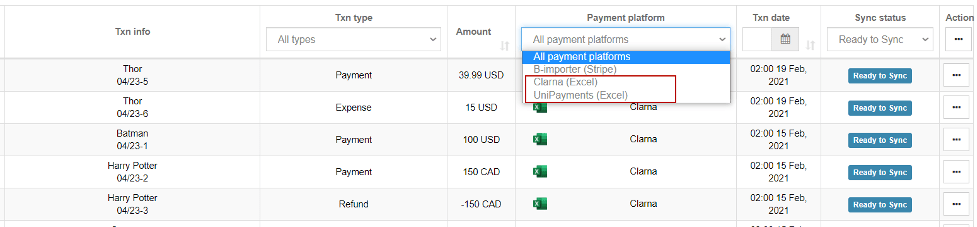
Note 4: You can connect Excel several times if you have several unsupported platforms. You will be able to differentiate between them and tailor their settings with this helpful excel to Synder accounting, Xero or QuickBooks converter.
This is it! Now you can import sales data from any desired provider you would like to synchronize with your accounting system. Easily convert Excel to Synder accounting, Xero or QuickBooks with the new Excel import feature, and import any data from an Excel spreadsheet to Synder. Efficiently import journal entries from Excel to your accounting company, as well as import invoices from Excel to it. The new Import from Excel feature aims to bring even more value for Synder users that operate with multiple sales channels.