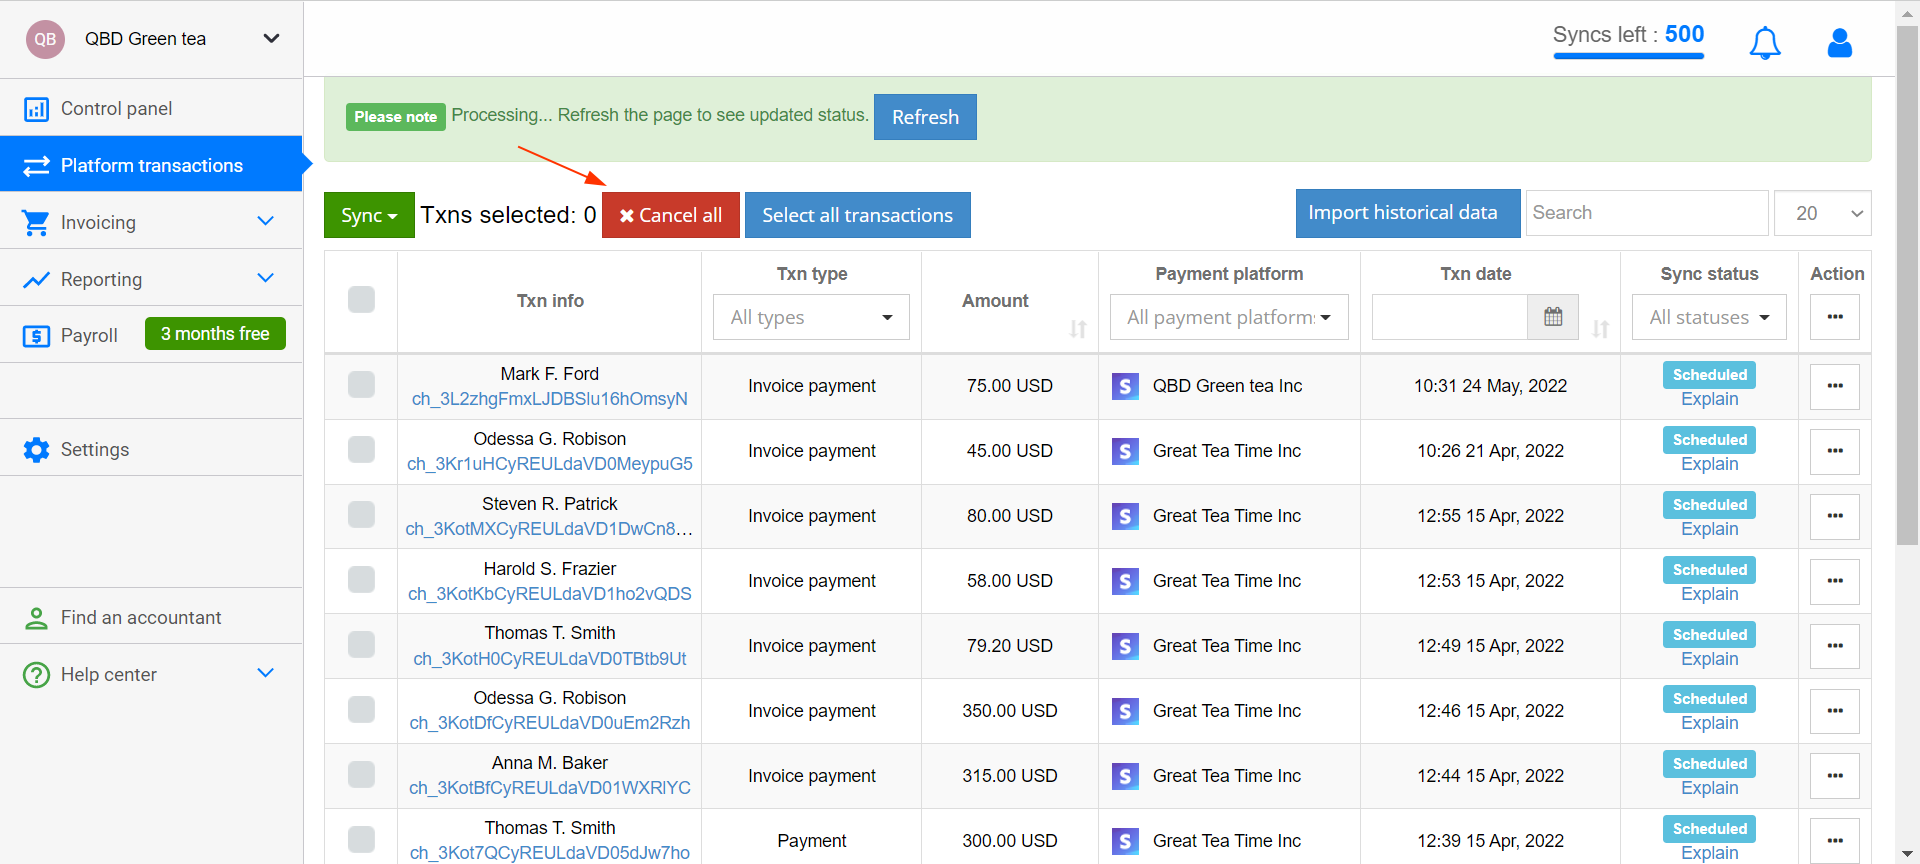
The ‘Scheduled’ status means that transactions are in the synchronization queue. If none of the transactions have been processed for a while, it is likely that the server has lost connection to the Synder Connector application.
How to import ‘scheduled’ transactions to QuickBooks Desktop?
In order to run the synchronization process, go through the following steps:
- Launch QuickBooks Desktop company;
- Open Synder connector application (look for it on your desktop and launch);
- Make sure that all the components of the integration are up and running (refresh the page if necessary).

To make the transaction synchronization process run smoothly, please make sure that you have the following steps in place:
1. Both pieces of software (Quickbooks Desktop and Synder Connector app) are installed on the same machine and on the same drive (drive C by default).
2. Your system does not fall into sleep mode.
3. Antivirus does not interfere with the synchronization process. Please add Synder Connector app as an exception or switch the antivirus off during synchronization.
4. You have a healthy Internet connection.
5. You are running the latest version of Synder Connector app.
6. The synchronization process will be restarted automatically, so your transactions’ status will start changing from “scheduled” to “synced”.
Note: Synchronize transactions in batches of 100-200. This will provide more efficient operation of the software application.
If all steps above are followed and still no transactions get synchronized, please follow the steps below:
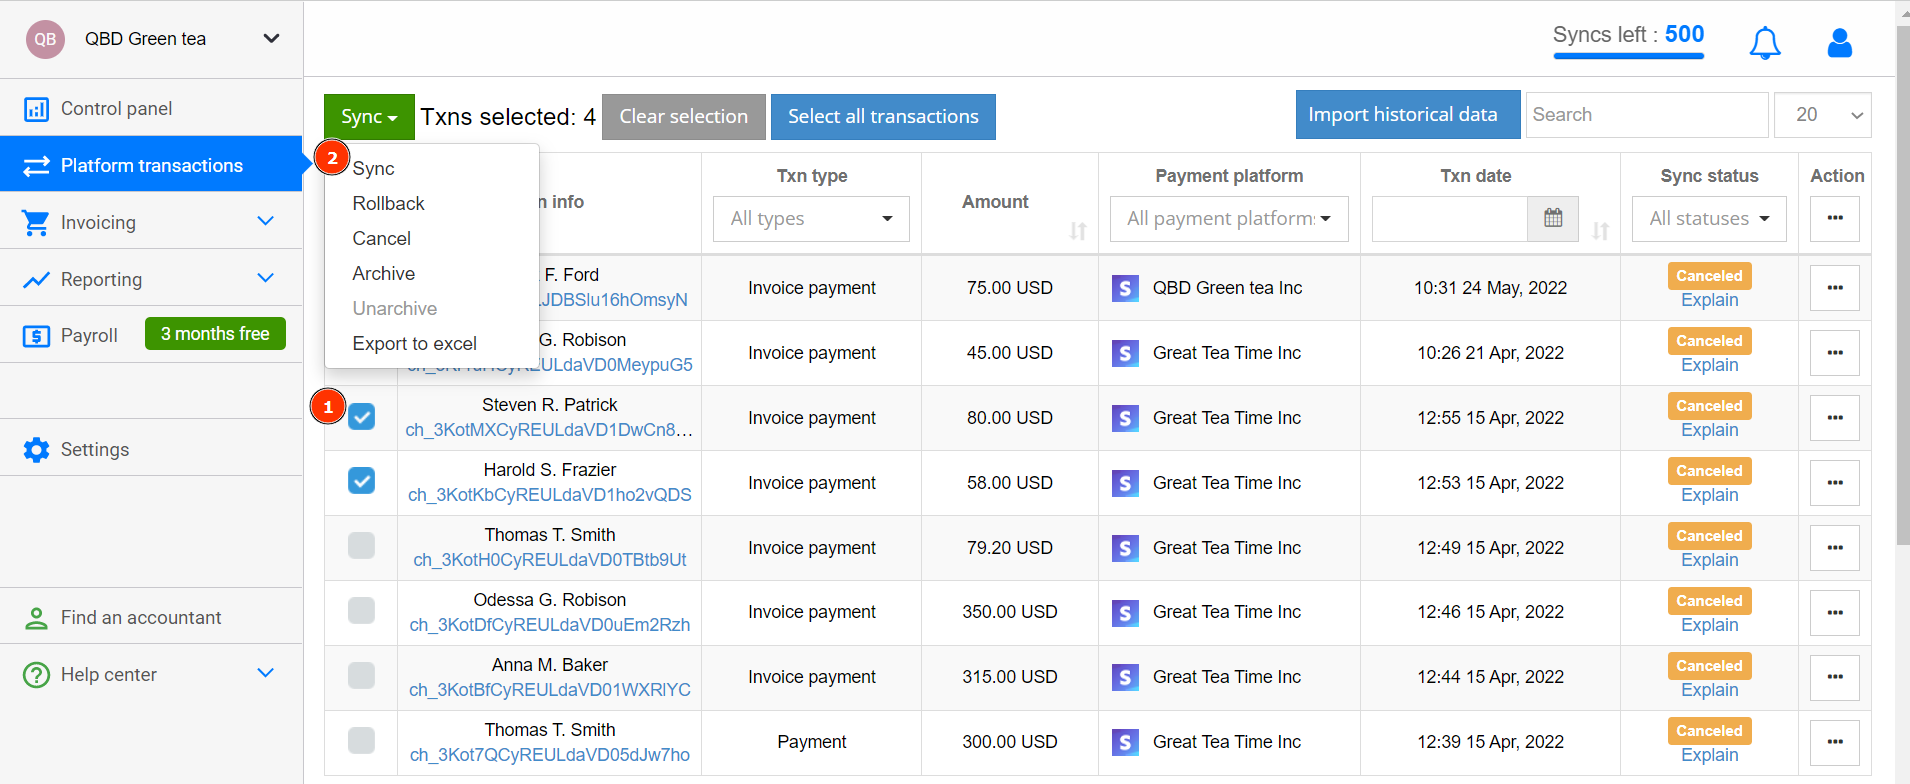
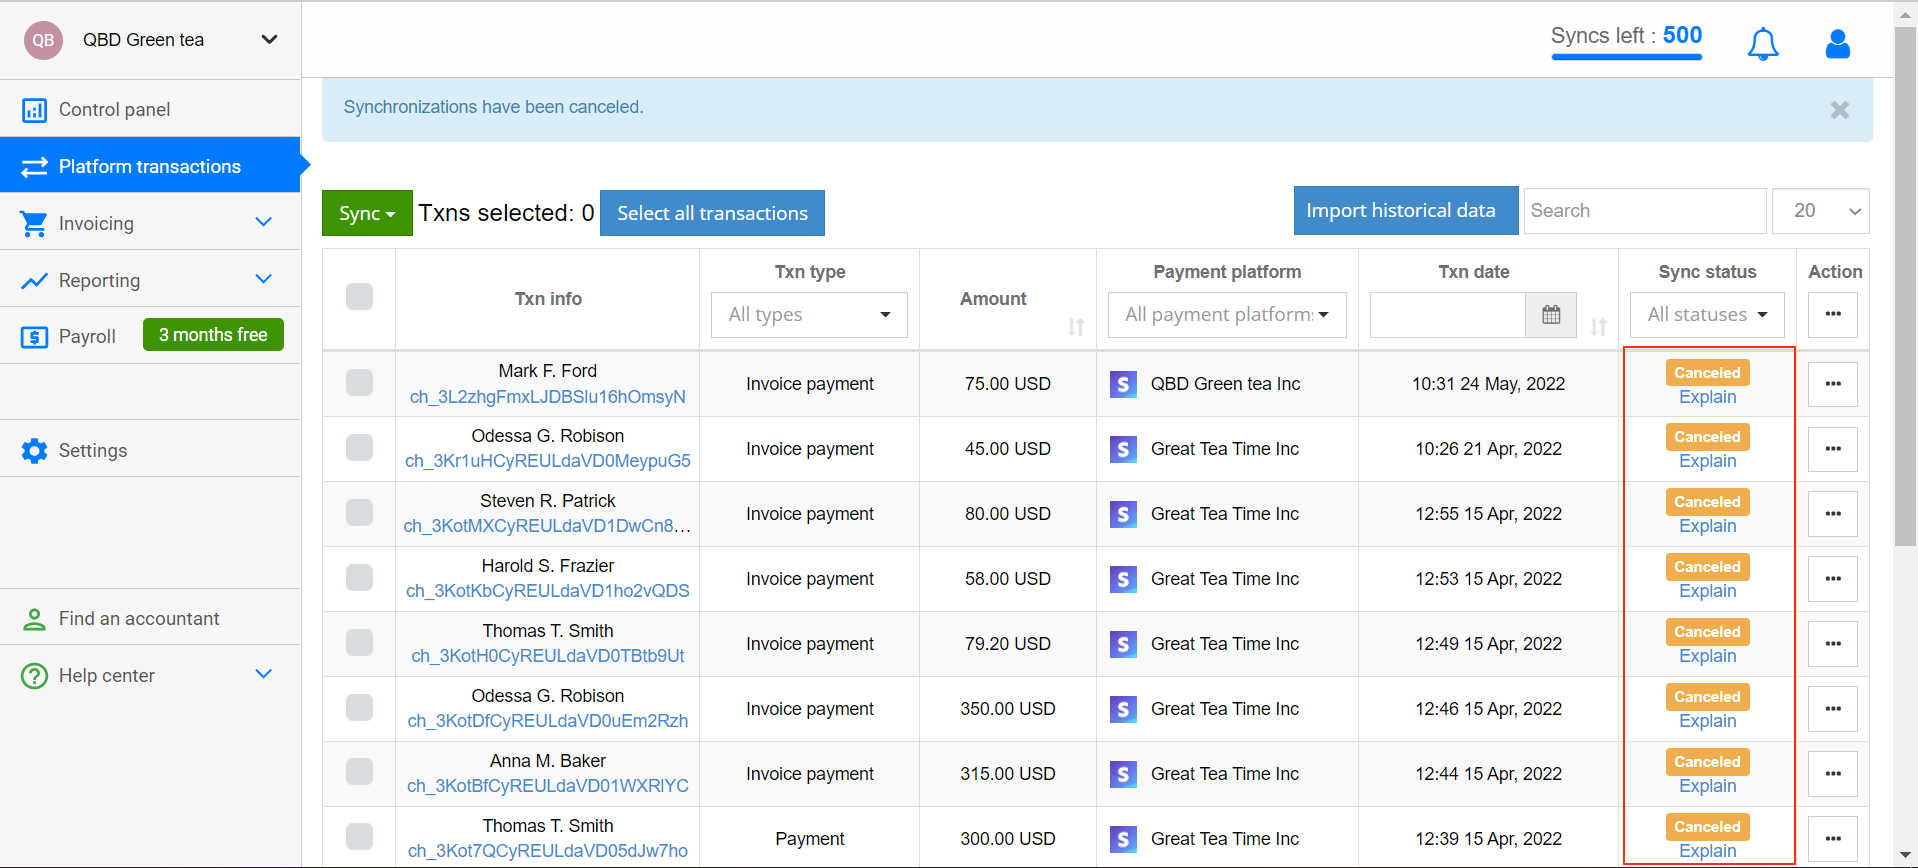
1. Open ‘Platform Transactions’ tab → Click ‘Cancel All’;
2. Make sure transactions get ‘Canceled’ status;
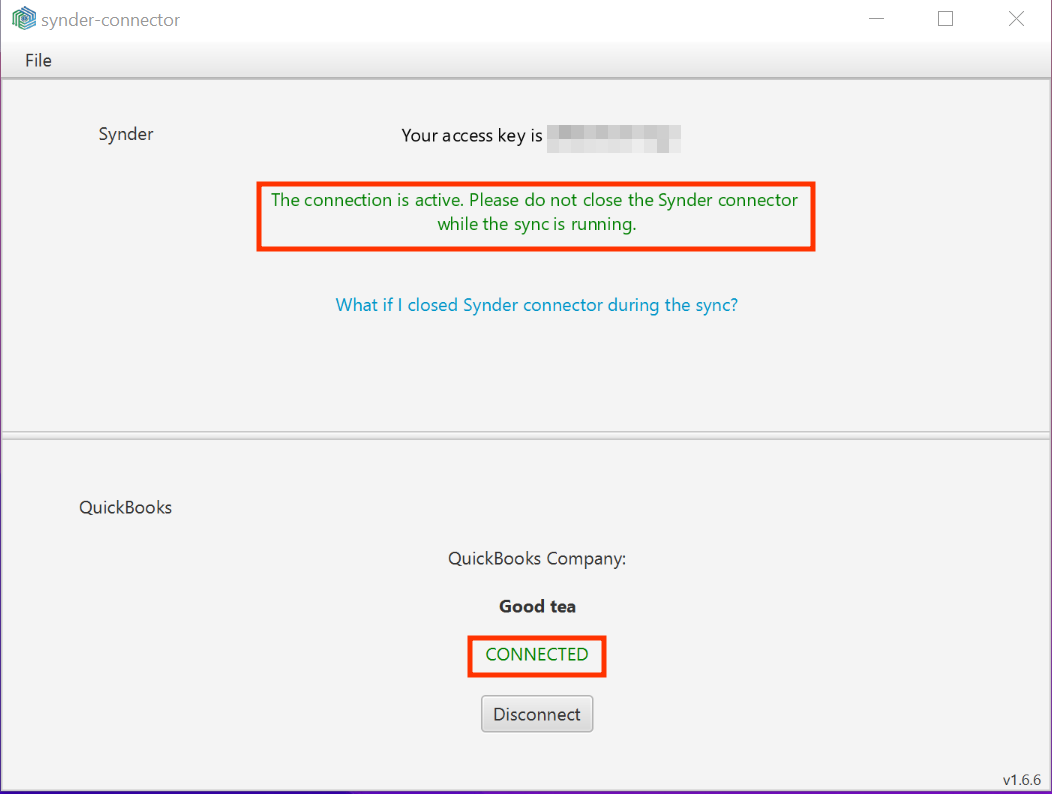
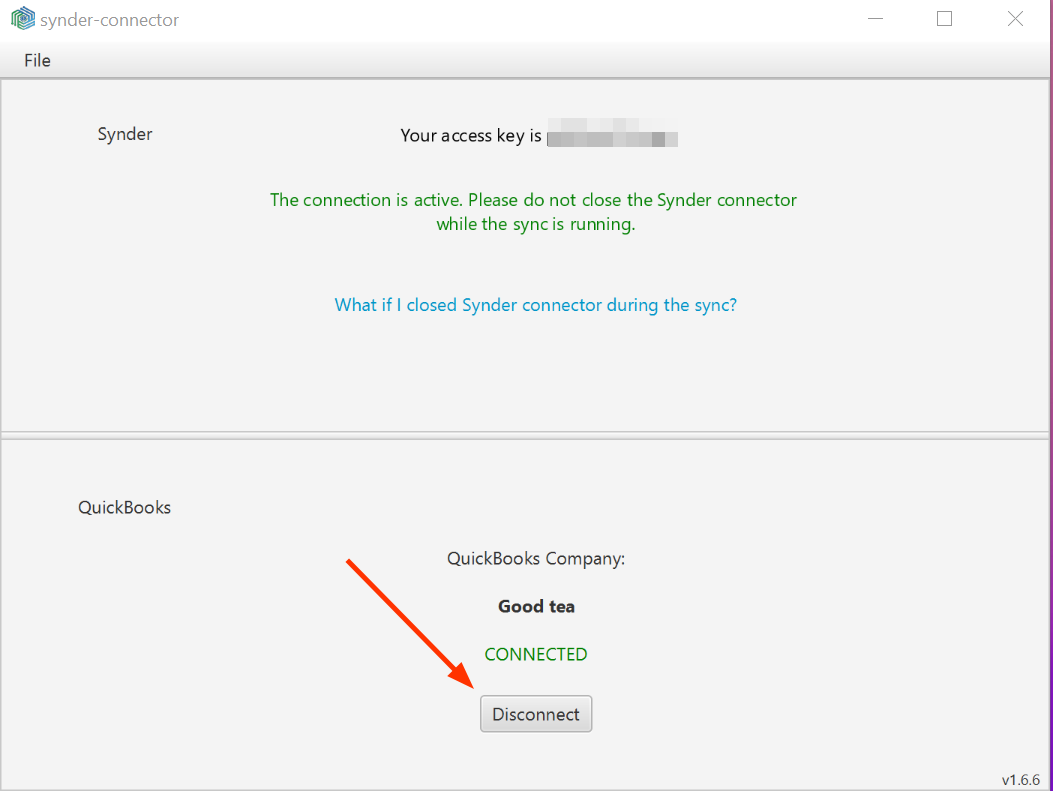
3. Open both Synder connector and QuickBooks Desktop, and click on the Disconnect button in the Synder connector;
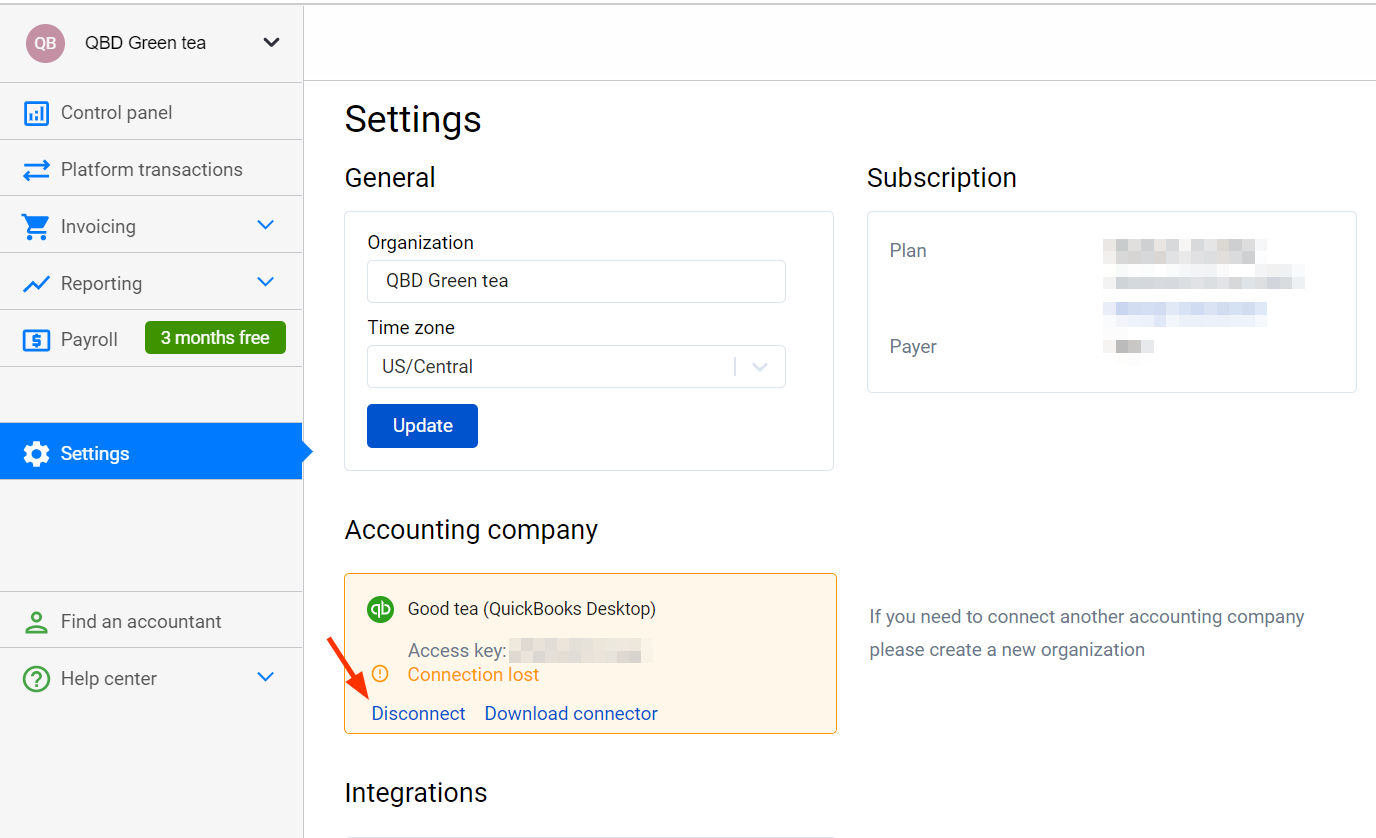
4. Switch to Synder in your browser, open the Settings tab on the left, and click on Disconnect on QuickBooks Desktop;
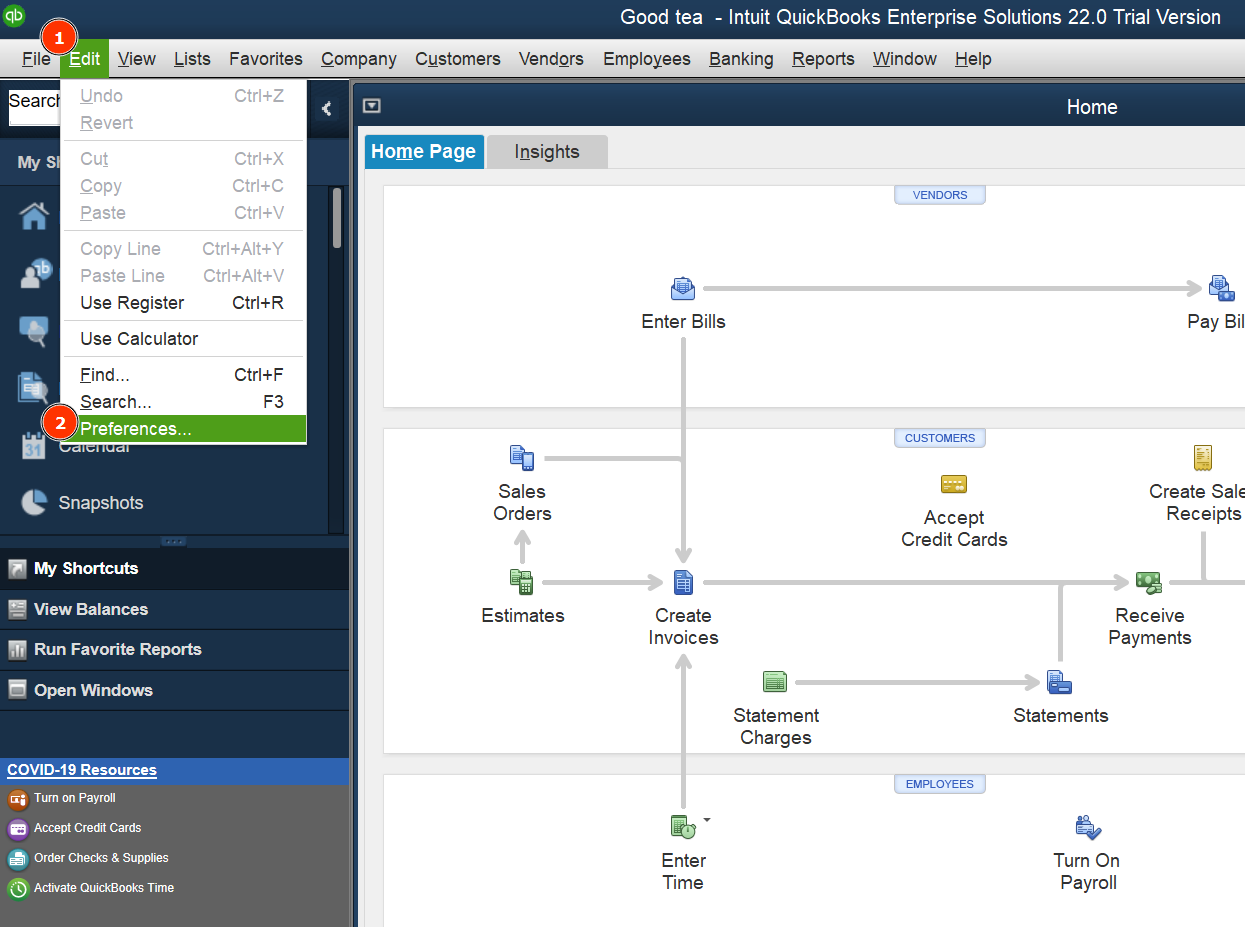
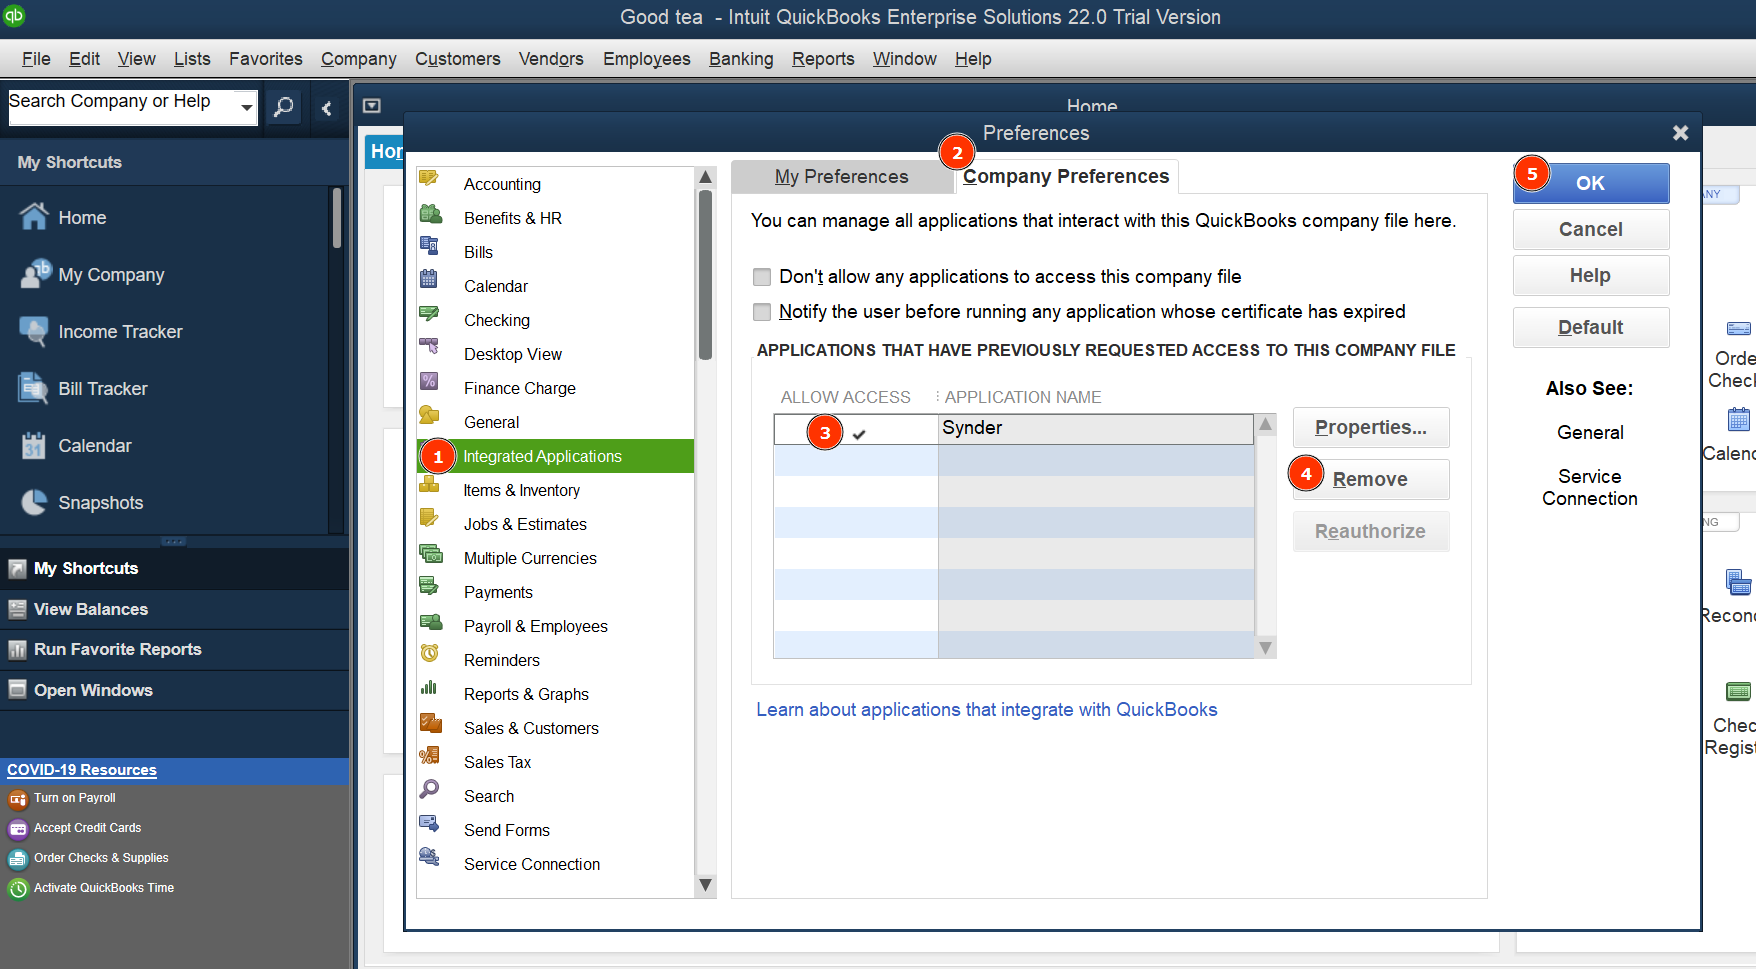
5. In your QuickBooks Desktop company file, click on the Edit tab at the top -> Preferences -> Integrated Applications -> Company preferences. Untick Synder there and click on the Remove button. Click Ok;
6. Open Settings on your computer -> Apps -> search for Synder and click on the Uninstall button;
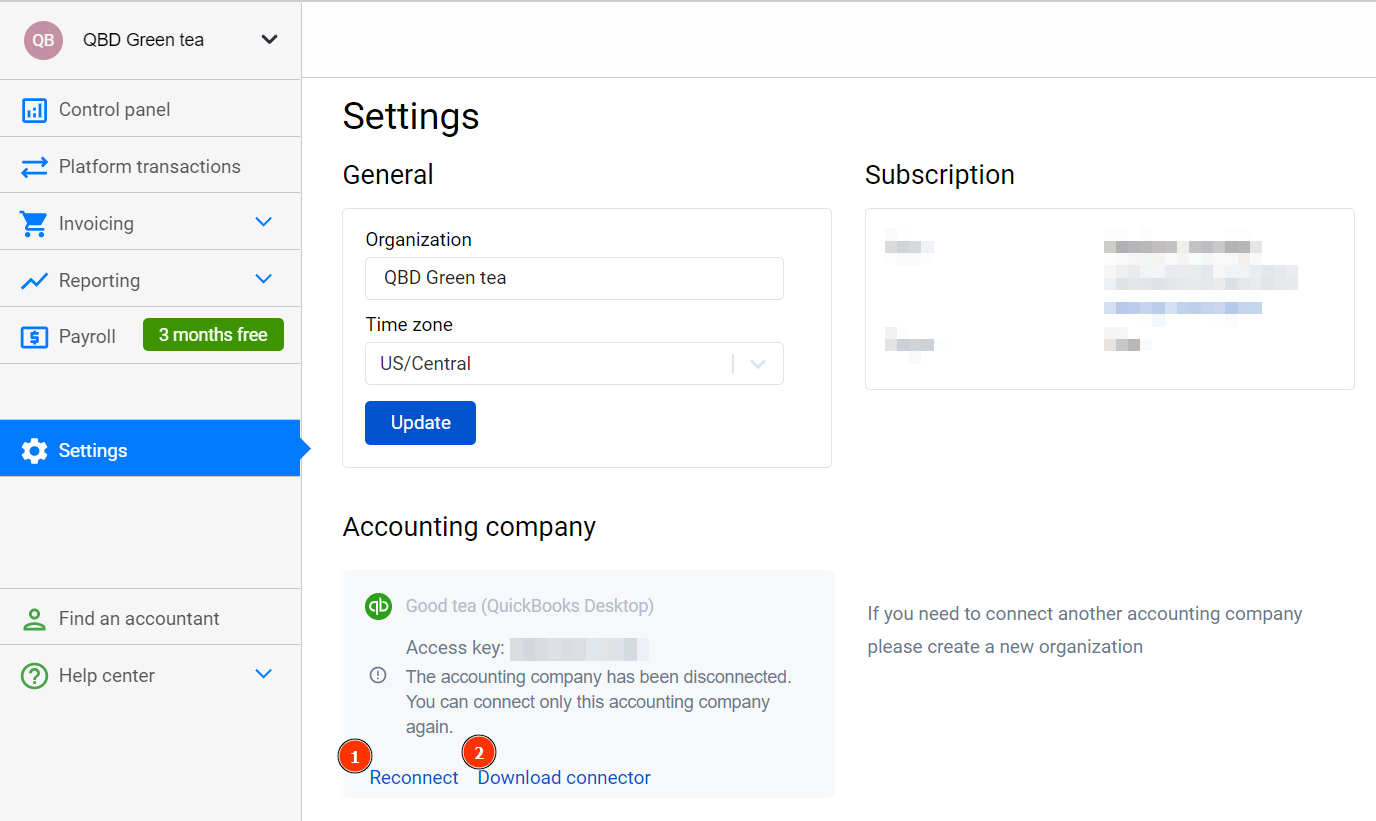
7. After that, please switch back to Synder in your browser -> Settings tab -> Reconnect button under QuickBooks Desktop;
8. Download the Synder connector, launch it and Click the Connect button to connect your QuickBooks Desktop Company;
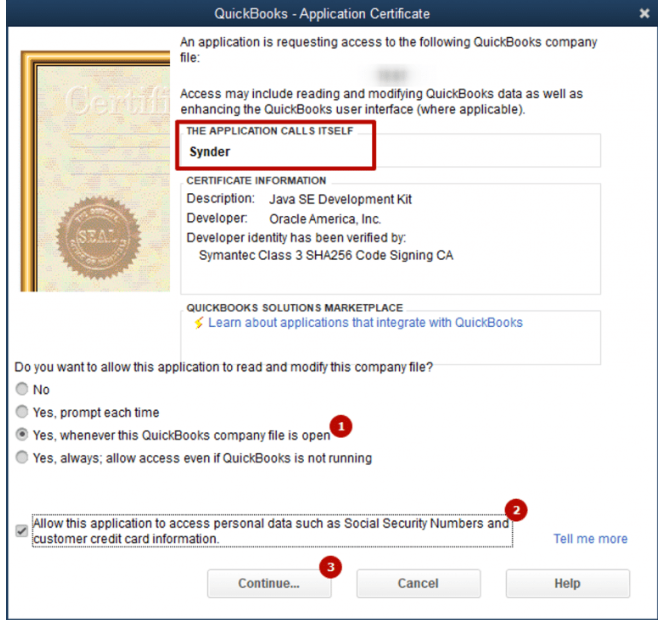
9. Mark corresponding options (1,2) to set up QuickBooks Certificate and click the Continue… button (3);
10. Click the Done button to confirm;
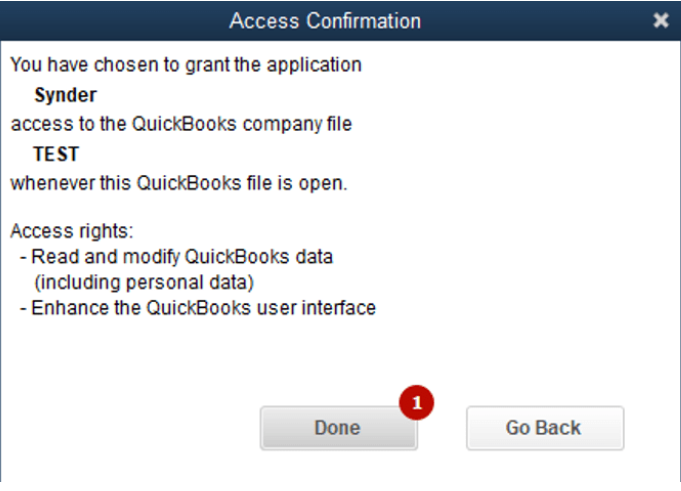
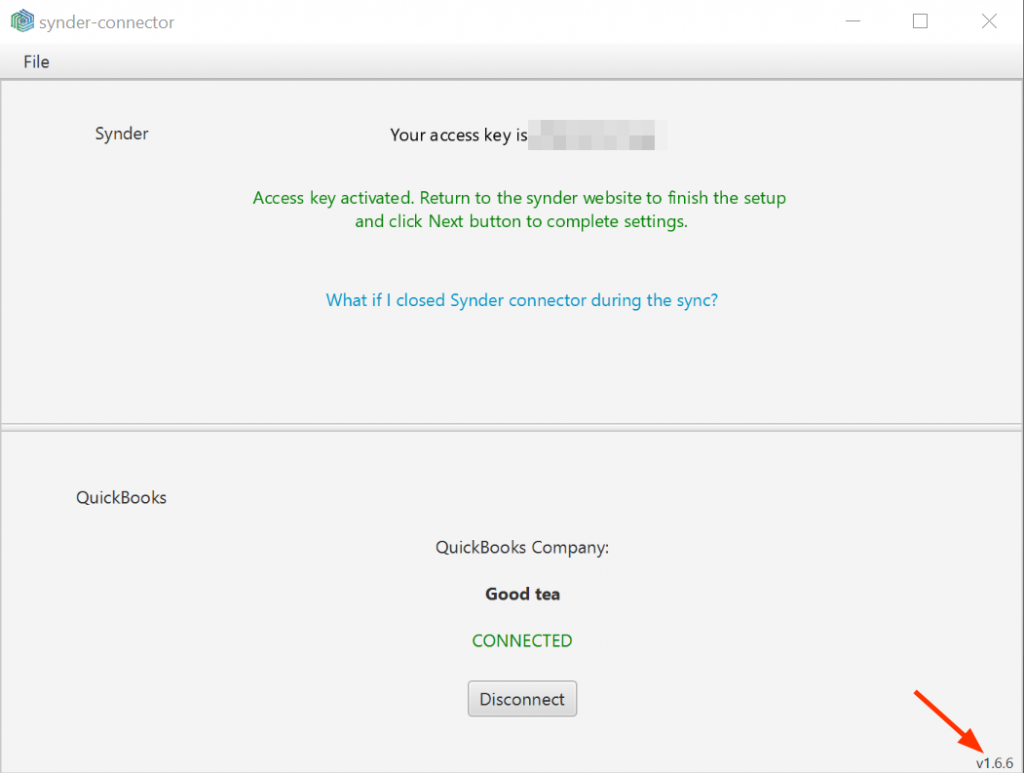
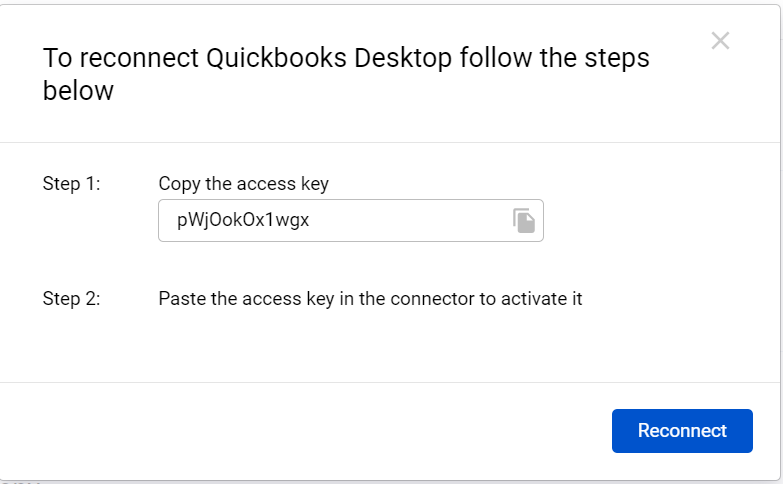
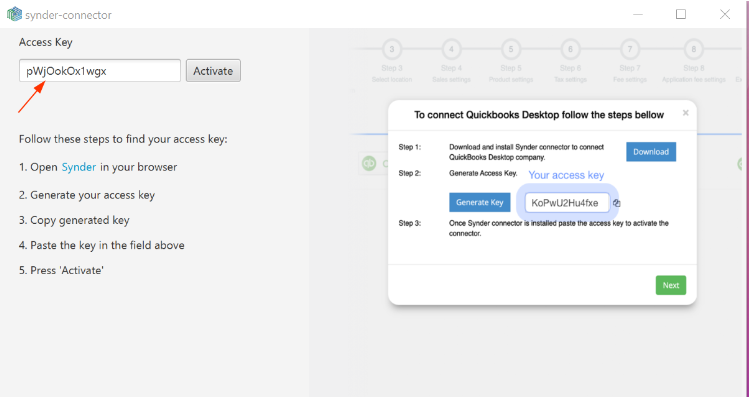
11. Copy the QuickBooks Connection access key and paste it in the Synder connector form, click the Activate button (please do not generate a new access key);
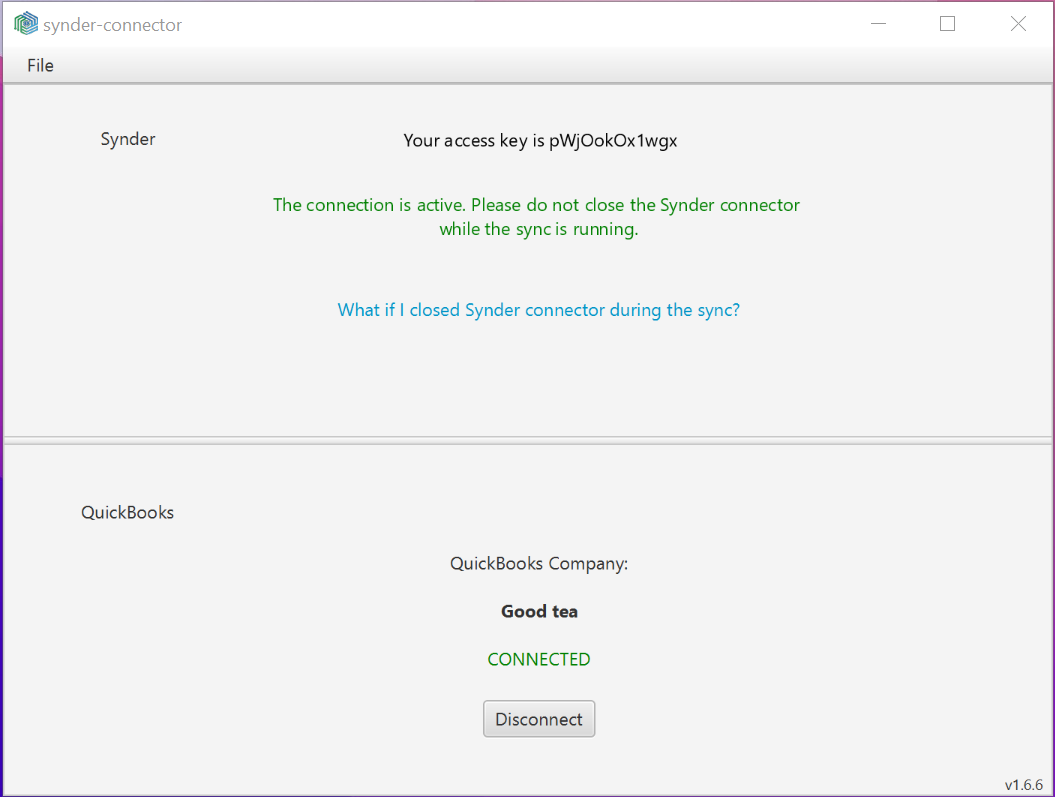
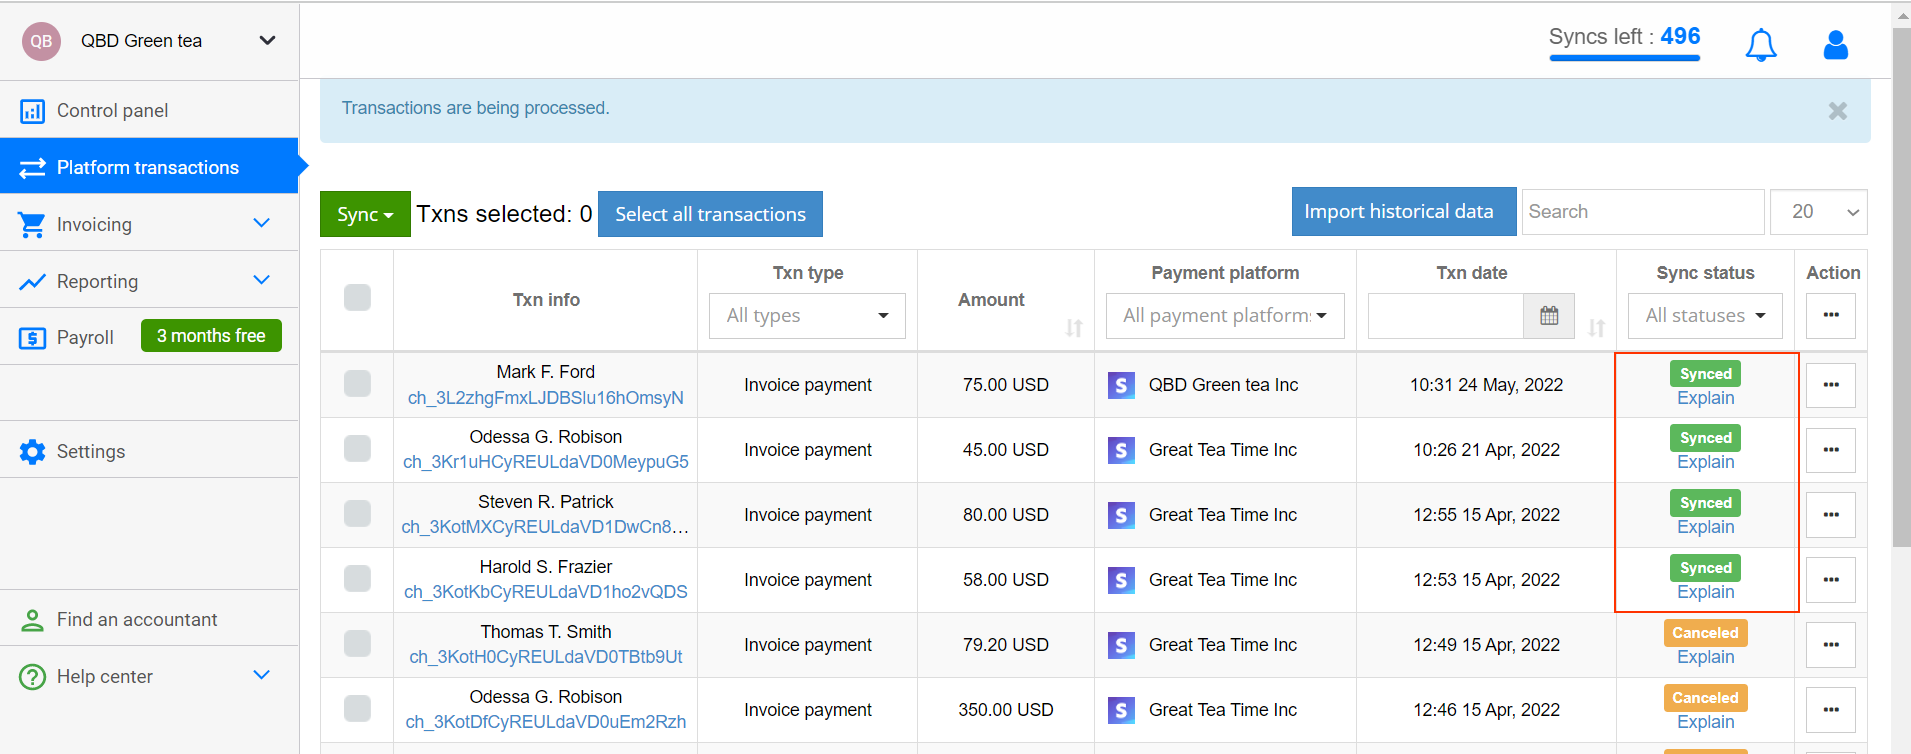
12. Once the connection is established, open the Synder website → navigate to ‘Platform Transactions’ → select and sync a couple of ‘Canceled’ transactions to test the synchronization process.